![]()
![]()
![]()
![]()
![]()
![]()
![]()
![]()
![]()
![]()
![]()
![]()
![]()
![]()
![]()
![]()
Web Updated;
06/07/2011
![]()

Mail me!
Sign the guest book
Constructing the coil.
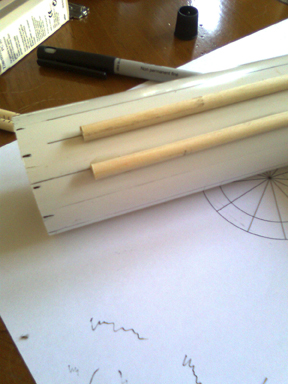
Marking Equal Divisions.First thing to do is to select your forma. The PVC pipe is a std. B&Q off the shelf with an external dimension of 56mm and approx 2mm thk. I had planned on dividing the coil into 13 equal spaced gaps between the supports, but left a double spacing to allow the clips easier access. By missing one of the supporting positions, 12 dowels were used. I am lucky to be trained in CAD/CAM software, so drew out a circle slightly larger than the outside of the PCV and divided it into 13 equal spacing. These were used as a template to mark to PVC pipe at one end. |
|
|
|
Transfer the markings.Once the circular divisions are marked, a transfer line along the length is required to ensure the supports are glued into place accurately. I found the best way to achieve this was to lay a metal ruler on the surface and position the tube to the correct height then draw down the length. This proved to be a very easy accurate way of ensuring the divisions maintained pitch and parallel to the forma length. Don't forget to use a "permanent" marker! |
Fixing the coil supports.Cut the 6mm diameter wood dowels to 130mm long and glue them into position along the lines. I found the best glue for this is Maxi-Fix multi purpose (bright yellow tube) Glue only three or four dowels at a time and allow at least two hours between batches to become firm. This method also allows slight adjustments in positioning before drying. Once all of them are in place, support the tube and allow to dry overnight.
|
|
|
|
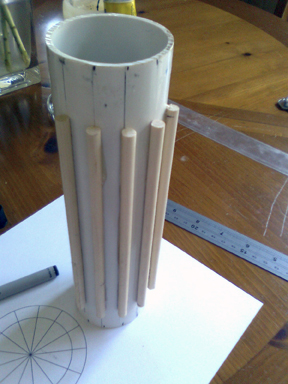
Supports in place.This is the photo with all the supports in place. |
Painting the forma and supports.I decided that the coil would look good with a dark background as the wire is a orange gold colour. I painted it with Satin Black paint, which did not have metal within it. (non metallic) I'm not sure if the black paint effects the coil operation, but on reflection any other colour than black would be better. Allow it to dry and then give it another coat. Two coats ensure that winding the coil will not scratch off any paint. |
|
|
|
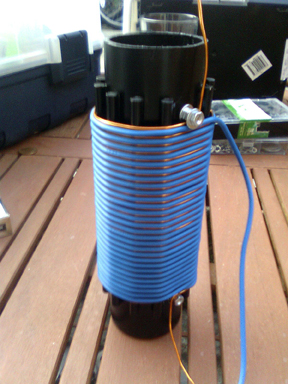
Winding the wire onto the coil.Drill a hole in the top and bottom of the forma to accept a 6mm thread. This makes the mounting connectors for the coil ends. Wind the 15 AWG (1.45mm) enamelled wire tightly around the coil from the starting point as shown. Wind in parallel with the enamelled wire a second "spacing" wire which in this case was a 2.0mm Multi-strand insulated wire. (shown blue) Pushing the spacing wire into the enamel windings and then tightening the two together around the coil forms a neat tight equally spaced coil. |
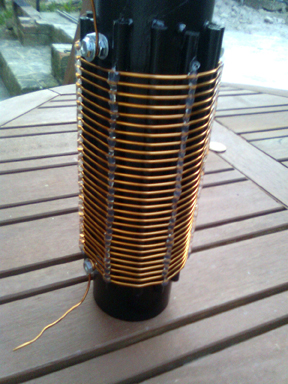
Remove the spacing wire and hot melt glue to coil.Now the coil is wound with the spacing wire (as shown above) tie the enamel wire on the bottom bolt and secure with a washer and nut. Now carefully remove the spacing wire and with a hot melt gun run a continuous bead along each dowel support and allow a few second to cool and set. I found it easier to glue dowel supports in quarter circumference points and then fill in the remaining, rather than gluing sequentially around the forma. This method allowed for some minor adjustments of coil spacing as I went. The photo right shows the finished article. I left long tails on the wires at this point until mounting on the aerial.
|
|